- Track your orders
- Save your details for express checkout
PVKCWP
Polyvance Kayak & Canoe Welder Professional
Plastic Welding & Heat Tools, Heat Tools and Plastic Welding, Default - No Category
With the Kayak and Canoe, or "KC" Welder Pro, you can create permanent repairs to your cracked kayak or cracked canoe. This kayak repair kit / canoe repair kit comes with everything you need.
KC Welder Pro Kit Contents:
- One heavy duty 200 watt element with a long cord
- One flat welding tip that makes repairs easy
- 10 feet of plastic welding strips in the color you choose
- Stainless steel reinforcing mesh
LDPE or HDPE?
The difference between LDPE (low density polyethylene) and HDPE (high density polyethylene) is the length of the molecule chains. HDPE has longer molecular chains than LDPE and the melting temperature of HDPE is often higher than that of LDPE.
LDPE's lower melting temperature usually makes using it as filler rod easier-to-use than welding HDPE filler rod to HDPE plastics.
HDPE is also "tougher" and more abrasion resistant than LDPE, but the practical difference is minimal when doing repair work. If you need the best wear characteristics and can live with making slower, more difficult welds, use HDPE rod. In most cases, we see better quality welds when using LDPE rod for typical crack or hole repair on boat hulls and ATV plastics.
How to Use the KC Welder Kayak Patch Kit
How to Repair a Kayak with an Airless Plastic Welder
Quit Making Temporary Repairs!
You may have tried to use different methods to repair your kayak or canoe using some creative techniqes. Techniques like...
- Liquid Nails (it peels off quickly)
- Glue Gun (Doesn't "burn in" well and quickly peels away)
- Rivet an aluminum plate and caulk the edge and hope that it holds. (Gets scraped off from the first rock you go over.)
- Sandwich a piece of rubber between an alumium plate and the kayak with rivets (or screws)
Those techniques you've tried must not have worked, or you wouldn't be looking at this page now. The KC Welder Pro allows you to make permanent repairs.
Step-by-step Instructions
Step 1
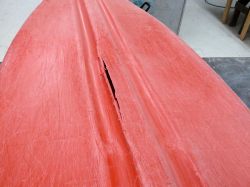
This is a typical crack that you might find on the bottom of a kayak. The first thing you need to do in any plastic repair is to clean the plastic. Use soap and water to remove any water soluble contaminants. If there are any contaminants, like tar, grease, or sticker residue, that won't come off easily with soap and water, then use one of Polyvance's plastic cleaners.
Realign the plastic if is has overlapped itself.
Step 2
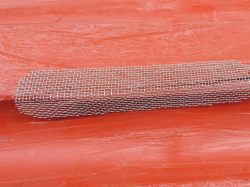
To maximize the strength of the repair, it helps to embed some wire mesh into the plastic. It is similar to putting rebar in concrete. Cut some of the included wire mesh to span the crack about an inch on side. On this particular repair, we had to fold the mesh because the crack was on a corner.
Step 3
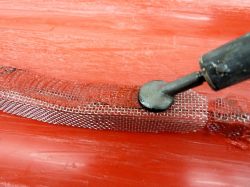
Using the KC Welder, melt the wire mesh into the plastic. This is similar to putting rebar in concrete. It makes the repair a lot stronger. Sometimes, the mesh wants to "pop out" of the plastic before the plastic cools. If that happens, use a screwdriver or another tool to hold the mesh into the plastic until the plastic re-solidifies.
Step 4
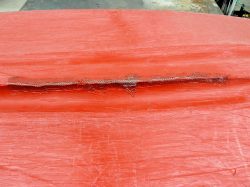
Here is what it will look like once the mesh has been melted into the plastic.
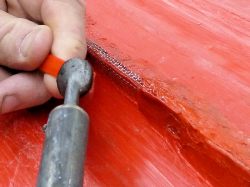
Step 5
Apply the filler rod by pre-melting one side of the rod.
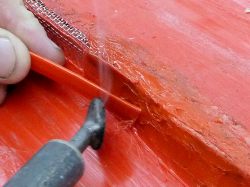
Step 6
Flip the filler rod over so that the melted side is toward the plastic that you are working on.
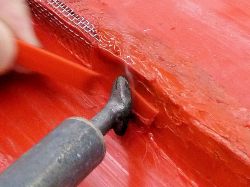
Step 7
Cut the tip of the rod off by melting through it with the edge of the welder tip.
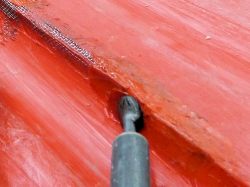
Step 8
Spread the melted rod while pushing it through the mesh. You may need to apply an extra layer of rod after pushing it through the mesh. Get the plastic hot enough so that the new melted plastic melts together with the existing plastic.
Step 9
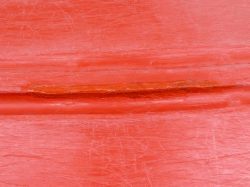
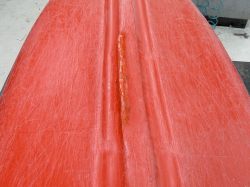
Continue applying plastic until the crack is repaired completely.
Cosmetic Restoration Video
Questions?
Thank you for your interest.
You might also be interested in ...

Polyvance 240V Replacement Element

Leister TRIAC Hot Jet S Hot Air Plastic Welding Kit

Techspan Rion Analogue Standard Automotive Hot Air Plastic Welding Kit


